This year, my husband and I will be celebrating our 22nd wedding anniversary. Time flies. We received many wedding cards from friends and relatives near and far to celebrate with us our special "I do" day. Vows made are meant to be kept in good times and bad times, in health and in sickness till death do we part. It's during those "bad" days that I take out all the cards to remind me of that one special day that meant so much to me. My dream came true and surely, other dreams can come true as well and they still do.

This is a pretty simple card to make. Get the papers and cardstock ready. If you have a printer at home you can go to www.papercraftinspirationsmagazine.co.uk for free download of fabulous pattern papers.

This is a pretty simple card to make. Get the papers and cardstock ready. If you have a printer at home you can go to www.papercraftinspirationsmagazine.co.uk for free download of fabulous pattern papers.

Roll out die cuts from Jeart 1401035 Frame#1/Goblet, 1202558 Love #2, Box 3-ornament#1 & 1202555 Flowers #8. I use embossed paper and foam for cut outs as well.

Cut out with Jeart 1401037 Tuxedo die shape and 1710037 Dress#4 and another for backing. The above ribbon is a sample of what I have used, you can pick your own choice of ribbons, they'll look equally pretty.

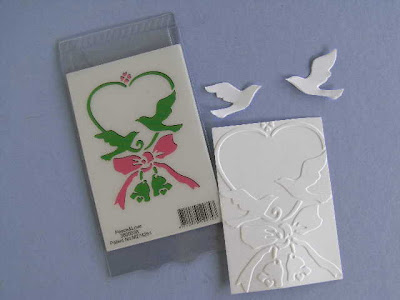
For the birds, I emboss with Jeart 3600038 Peace & Love embossing die and then cut out the birds. You can also cut out the ribbon for extra decoration.

Roll out the Jeart 1710008 Ring die shape and replace the paper jewelry with clear buttons instead. You can find these buttons at shops that sell tailoring materials.

The tuxedo and gown can be left as they are (refer to my other wedding card) or you can draw out faces and hair and body parts to create a full human figure. I hand drew a veil on tracing/vellum paper.
I use sticky foam for the 3-D look. Cut small pieces of the foam tape and stick all around cut outs. I do it with most of the cut outs.

Wrap the ribbon around the gown to give the gown a full dress look. Secure the back with double sticky tape.
I arranged mine to look like this.


